Which Pipes Are Most at Risk in a Cabin
Cabin pipe freezing has gotten complicated with all the conflicting advice flying around. As someone who drove two hours to discover a burst line under my kitchen sink at 6 a.m. on a February morning — having left completely convinced everything was fine — I learned everything there is to know about where pipes fail in cabins. Today, I will share it all with you.
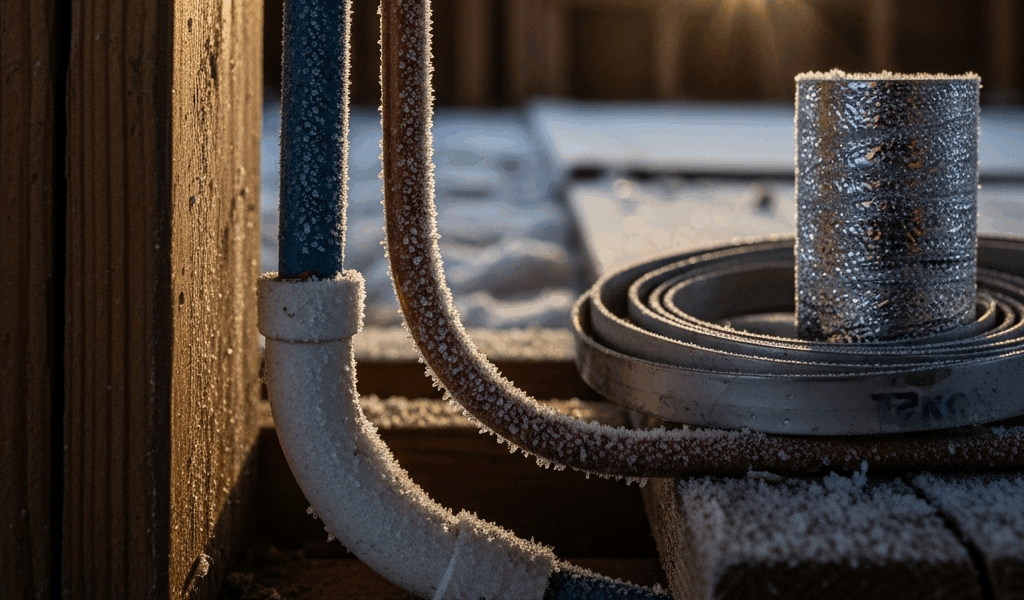
But what is the real risk factor here? In essence, it’s location, not pipe material. But it’s much more than that. The danger zones in a cabin look nothing like those in a year-round house. Pipes running through uninsulated crawl spaces take the hardest hit — the kind you find under cabins built on pier or post foundations. Zero thermal mass. Zero wind protection. If your cabin sits on blocks or posts rather than a concrete slab, you’re already behind before winter even starts.
Supply lines under kitchen and bathroom sinks on exterior walls are brutal offenders. That wall gets hammered. The pipes inside the cavity — especially in cabins built cheaply or modified over decades — may have never seen proper insulation. Same goes for pipes running along outside log walls or under rim joists on the north face of the building.
Detached bathrooms and outbuildings are their own category entirely. A pipe running from the main cabin out to a guest house or sauna? Assume it freezes. No ambient cabin heat reaches that supply line. It’s exposed for 50, maybe 100 feet with nothing around it but cold air.
The single best thing you can do before winter: grab a flashlight and walk your cabin’s foundation. Crawl under there if you fit. Mark every pipe with a Sharpie. Note what’s insulated and what isn’t. Not glamorous work. But it tells you exactly where the problems are hiding.
What Temperature Actually Freezes Cabin Pipes
Thirty-two degrees Fahrenheit is the textbook answer. It’s also wrong for cabin conditions.
Water in exposed pipes starts forming ice crystals well before freezing solid. But cabins are not well-insulated environments — a pipe sitting in an uninsulated crawl space in 25°F outdoor air is experiencing something far colder than the thermometer suggests. Wind chill matters enormously here. A pipe exposed to 20°F air with 15 mph gusts encounters effective temperatures closer to 0°F. That pipe freezes faster than a sheltered pipe at the exact same outdoor reading.
Damage typically kicks in when overnight lows drop below 20°F and stay there for several hours. Running intermittent heat — say, 55°F while you’re away — pushes that threshold lower. No heat at all? A cabin with no active heating will have frozen pipes by morning once outdoor temps hit 15°F or below. That’s the window where things go wrong fast.
I’m apparently unlucky with propane equipment and a particular brand of thermostat that worked for me once before it stopped working entirely. Don’t make my mistake. Propane cabins are deceptively vulnerable — if your tank runs empty or a thermostat malfunctions, protection disappears instantly. I watched pipes freeze between dusk and dawn once because of a pilot light failure nobody caught. Three days away, temps dropped to 18°F, and nobody heard the furnace quit.
Wind chill makes the difference between a close call and a disaster. A pipe in an enclosed crawl space at 20°F outdoors sits closer to 25°F at the pipe itself. That same pipe in an open under-deck space with wind blowing through? Functionally closer to 10°F. It’s not just temperature. It’s exposure, and exposure is everything.
How to Prevent Pipes from Freezing When You Leave
Prevention comes down to one of two things: remove the water from the pipes entirely, or keep enough heat around them that ice never forms. Sometimes you need both.
Drain the system if you’re gone for more than a few days. Shut off the main supply valve. Open every faucet — kitchen, bathroom, shower, every outdoor spigot you can find. Leave them open. The goal is getting all standing water out of the lines. Residual water in low spots will still freeze, but significantly less of it than a fully charged system. This is the most reliable method for seasonal cabins. It costs nothing and works even if your heat fails entirely.
Set a thermostat floor if you’re leaving heat running. Fifty-five degrees Fahrenheit minimum. Won’t feel warm. But it’s enough to keep pipes in insulated walls from freezing. Uninsulated crawl space pipes are a different story — 55°F won’t save those. You need heat tape for anything out there.
Heat tape is essential for exposed runs. Get the self-regulating kind, not constant-wattage. Frost King makes a solid product — around $20 to $30 per 6-foot section at most hardware stores. Wrap it around any pipe running through an uninsulated space. Plug it into a GFCI outlet on a reliable circuit, and accept that a power outage defeats the whole setup unless you have backup power. Heat tape works best when you wrap foam pipe insulation over the top of it.
Foam pipe insulation is your cheap baseline fix. One-inch foam sleeves run $3 to $6 per 6-foot section. They reduce heat loss dramatically but generate no heat themselves. They buy you time and raise the threshold at which a pipe freezes — but won’t prevent a freeze in true deep-cold conditions. Think of them as insurance, not a solution.
Probably should have opened with this section, honestly: none of these work if you lose power or run out of fuel. A generator solves the power problem for heat tape. A full propane tank and a thermostat with a low-temperature override solve the heating side. But relying on any single solution leaves you exposed.
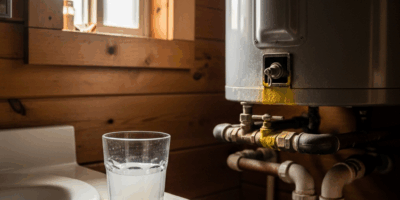
You Arrive and a Pipe Is Frozen — Do This First
The first move is counterintuitive. Before anything else — turn off the main water supply.
A frozen pipe hasn’t necessarily burst yet. But the ice blockage has already created pressure on both sides of the frozen section. The moment that ice thaws and water pressure returns, any crack becomes a full leak. You want to cut that pressure off before thawing starts. Main valve off. Period.
Once the supply is shut, open all faucets. This relieves residual pressure and gives meltwater somewhere to drain instead of pooling and refreezing in a low spot.
For thawing: a heat gun on the lowest setting held about 6 inches from the pipe, moving constantly, works well. A hair dryer works. Warm — not hot — towels wrapped around the affected section. Give it 20 to 30 minutes of patient heat application. Do not use open flame. Do not pour boiling water on the pipe — thermal shock cracks the line faster than the freeze did.
Work from the faucet back toward the frozen section. You’re hunting for the blockage point. Once water starts trickling from the open faucet, you’ve broken through the ice.
Here’s the hard part: a pipe that froze is already compromised. Leave the supply off for a few hours after thawing. Get under the sink, check around the affected area, look for drips or wet spots. Only then turn the main back on — slowly — and watch for another 20 minutes before walking away.
Permanent Fixes Worth Doing Before Next Winter
Short-term prevention gets you through this season. Permanent fixes eliminate the panic call next December.
Start with the cheap stuff. Foam insulation sleeves on every exposed pipe runs $50 to $100 total. Heat tape on crawl space runs adds another $100 to $200. These are mandatory. Fast to install. Do them first.
Skirt the foundation next. Foam panels or rigid insulation around the perimeter of your cabin cuts off wind access to the crawl space entirely. Cost runs $200 to $500 depending on cabin size. That’s where the biggest impact comes from — pipes in a sheltered crawl space behave dramatically differently than pipes in one that’s open to the wind.
Add a smart thermostat with freeze protection. A Nest or Ecobee — $250 to $350 — can send your phone an alert if cabin temps drop below 50°F. Some models have built-in freeze protection that overrides your schedule automatically when temperatures plummet. That’s what solves the “furnace quit and nobody knew” problem. That’s what makes remote monitoring endearing to us cabin owners who can’t always be there in person.
Insulate the crawl space ceiling. Fiberglass batts stapled to the underside of floor joists add 10 to 15 degrees of effective protection to that space. Cost: $200 to $400. Rerouting exposed pipes into interior walls is the ultimate fix — but that’s renovation territory. Budget it for next spring and plan accordingly.
So, without further ado, here’s the honest priority list: foam and heat tape this season, skirting and a smart thermostat next, crawl space insulation after that. That combination beats overnight freezes nearly every time — at least if your heat source stays running and your tank stays full.

Stay in the loop
Get the latest rustic cabin world updates delivered to your inbox.