How to Keep Mice Out of Your Cabin This Winter — What Actually Works
Keeping mice out of a cabin has turned into a moving target with all the myths and miracle products flying around. Every other article you’ll find is written for a ranch house in a subdivision — generic advice about sealing gaps and storing food, as if that’s the whole story. It isn’t. I’ve owned a log cabin in northern Wisconsin for eleven years, and I got hands-on with mouse-proofing the hard way. Some April openings were genuinely awful — chewed propane lines, a bird’s nest somehow built inside my cast iron skillet, droppings covering every flat surface in the kitchen. Other years I walked in to nothing. Zero evidence. The difference wasn’t luck. It was a closing process I worked out through painful, expensive trial and error.
That process is what this guide is built around. It’s checklist-heavy on purpose — because when you’re closing up in October, it’s already dark by 5 PM, and you’ve got a four-hour drive home, you need a checklist more than you need another essay.
This article includes affiliate links. We may earn a commission at no extra cost to you.
Why Cabins Are Especially Vulnerable to Mice
But what is the actual problem here? In essence, it’s a combination of construction vulnerabilities, location, and vacancy. But it’s much more than that.
Start with the building itself. Log cabins have chinking — the mortar or sealant material packed between log courses — and it deteriorates. Freeze-thaw cycles crack it. UV exposure dries it out. A gap that wasn’t there three seasons ago absolutely is now. Mice can compress their bodies through any opening larger than roughly a quarter inch. An older cabin can have dozens of those gaps on a single exterior wall.
Then there’s where cabins actually sit. Out in the woods, near actual wilderness — not a neighborhood with cats and foot traffic and noisy kids. The mouse pressure on a rural cabin in the Northwoods or the Appalachians is categorically different from a house in town. More mice, fewer competing shelter options. Simple numbers.
The biggest factor, though, is vacancy. A lived-in house has constant human activity — noise, smell, heat, movement. Mice avoid that when they have alternatives. An empty cabin from November through March is exactly what they want: warmth, shelter, zero disturbance, and usually some forgotten food. Nobody’s there to run them off. Nobody’s there at all.
That’s what makes cabin mouse-proofing its own thing — distinct from anything a generic pest control article will tell you. Vulnerable construction plus high rural mouse pressure plus months of vacancy. Fix only one piece of it and you’ll still walk into a mess come spring.
The Fall Closing Checklist — Before You Leave
Worth putting near the top. Everything before this is context. This is the actual work.
Food Removal — All of It
The number one mistake cabin owners make is leaving food behind. Not the obvious stuff — most people grab the chips and the bread. I mean the food that doesn’t feel like food. A half-used bag of steel-cut oats. The hot cocoa packets shoved to the back of the cabinet. Three cans of soup. A bottle of vegetable oil that’s been there since July.
Mice smell calories through packaging. Cardboard is not a barrier. Thin plastic is not a barrier. Even canned goods aren’t entirely safe — mice will chew through paper labels hunting traces of food residue on the outside of the can, then nest behind whatever’s stacked against the wall.
My rule: if it’s organic and has calories, it leaves. Everything. The only items I leave behind are things sealed in thick glass mason jars with metal lids — and even those get wiped down first. Spice jars get pulled. Dog treats get pulled. That emergency granola bar I apparently stuffed in the junk drawer three years ago — pulled. Skip the misstep I made of learning this after the fact.
Cleaning
After food removal, clean every surface that’s ever seen food. Stovetop, oven interior, microwave, countertops, the floor under the stove — all of it. Grease and crumbs are attractants just like food is. Take out the trash completely — not just empty the can, take the bag, rinse the can. Wipe down cabinet interiors while you’re in there.
Sealing Gaps
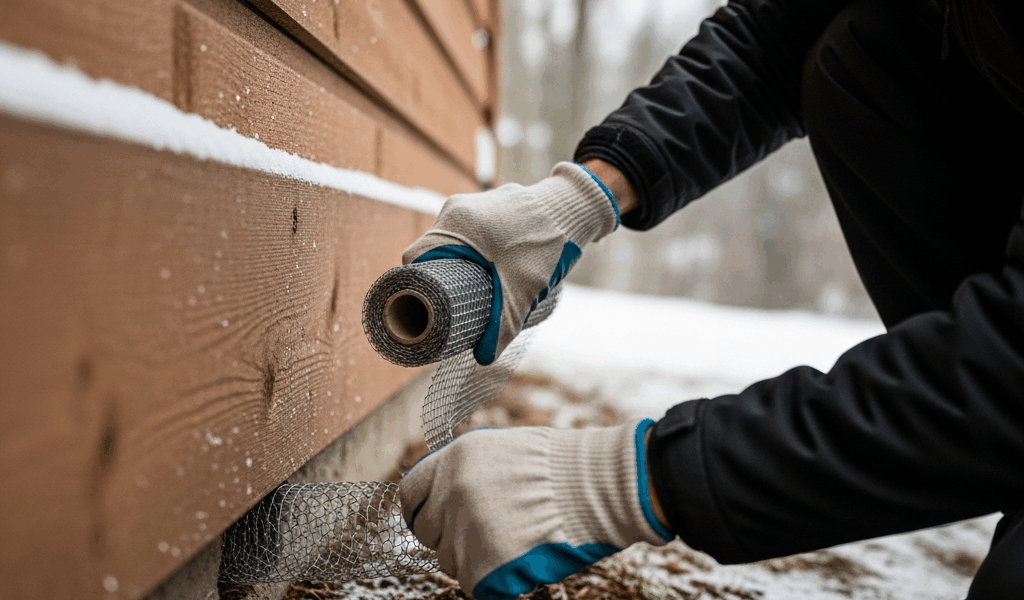
Walk the exterior with a tube of DAP Dynaflex 230 caulk and a brick of Stuff It copper mesh — about $18 for a 100-foot roll. Any gap larger than a quarter inch gets stuffed with copper mesh first, then sealed over with caulk. Steel wool works in a pinch but rusts over time and eventually falls out. Copper mesh holds its shape, doesn’t corrode, and mice hate trying to chew through it.
Check your chinking while you’re out there. Run your hand along the log courses. Crumbly sections, spots pulling away from the logs, visible cracks — those need resealing before you leave. Sashco Log Jam is a solid chinking product, about $85 for a five-gallon bucket that’ll last multiple seasons. A crack you can slide a playing card into is a crack a mouse will eventually work into a real entry point. Give it enough winters and it’ll get there.
Snap Traps
Set snap traps before you leave — not poison bait. Poison creates dead mice inside your walls, and dead mice inside your walls create a smell the following April that you will not forget. Victor Original snap traps, pea-sized amount of peanut butter, placed along walls in the kitchen, near the water heater, and under the bathroom sink. I set eight traps for a 900-square-foot cabin. Check and reset them on every visit, and set them fresh right before final closing.
Entry Points Specific to Log Cabins
Generic articles tell you to check where pipes enter the wall. Fine — that’s a start. Log cabins have a longer list.
Where Logs Meet the Foundation
The sill log — the bottom log resting directly on the foundation — is one of the most common entry points in older cabins. Settlement, wood shrinkage, and foundation movement all open gaps at that junction over time. Get down low with a flashlight and check the entire perimeter from both inside and outside. Fill any gaps with copper mesh and hydraulic cement, or exterior caulk rated for masonry-to-wood contact.
Chimney Penetrations
Mice are excellent climbers — better than most people assume. Where your chimney passes through the roof or an exterior wall, there’s almost always some gap. A chase cover on top of the chimney helps, but also look at where the chimney base meets the logs or framing. That junction flexes with temperature swings and tends to open up gradually over years of use.
Utility Entries
Every pipe or wire entering your cabin is a candidate. Plumbing under the kitchen sink, electrical conduit through the foundation, propane line entry points — often sealed when the cabin was built, gradually loosening since. Stuff It copper mesh around the pipe, then seal with caulk or foam. Don’t rely on expanding foam alone. Mice chew through it without much effort, apparently without much inconvenience either.
Doors — Especially on Log Cabins
Standard door sweeps are designed for flat, consistent thresholds. Log cabin floors aren’t always flat. A sweep that seals perfectly in the center of the door can have a quarter-inch gap at one corner — enough. I use a brush-style door sweep on my front door, the Pemko 315CN, about $22 at the hardware store. The bristles conform to uneven surfaces in a way a rigid rubber strip just won’t. Check every exterior door. Get on the floor and look at the light coming through while the door is closed. If you see light, a mouse sees an invitation.
What Actually Deters Mice — Evidence vs. Myths
I’ve tried most of the popular deterrents over the years. Here’s the honest version.
Peppermint Oil
Mice genuinely don’t love the smell — that part is apparently true. The problem is dissipation. You soak some cotton balls, drop them in corners, and by week three the scent is gone and you’re four hours away. It might slow a curious mouse down for a night. It does not keep mice out of an empty cabin through a four-month winter. Skip it as anything more than a footnote.
Ultrasonic Repellers
No credible evidence they work. The FTC has gone after manufacturers for making unsupported claims. Peer-reviewed studies haven’t found consistent deterrent effects under real-world conditions. Don’t buy them.
Dryer Sheets, Mothballs, Irish Spring Soap
Same category as peppermint oil — temporary at best, useless across a winter vacancy. Mothballs are also genuinely toxic to humans and pets and have no business being used inside living spaces.
What Actually Works
Physical barriers. That’s it. Copper mesh, hardware cloth — 1/4-inch galvanized, not 1/2-inch, mice go right through 1/2-inch — and caulk. Complete food removal. Snap traps that kill mice already inside before you walk out the door. Those three things, done thoroughly, are what actually move the needle. Everything else is wishful thinking sold in a plastic bottle.
Frustrated by my third consecutive bad winter, I spent a full October weekend doing nothing but sealing entry points with copper mesh and checking every door threshold with a flashlight. That spring I found two dead mice in snap traps and nothing else. Two mice — both caught before they reproduced, before they nested, before they chewed anything. That’s the whole difference between myth and method.
Spring Opening — Signs of Mouse Activity and Cleanup
Open windows the moment you arrive in spring. Before anything else — ventilate for at least 30 minutes. This matters more than it sounds.
Identifying What You’re Dealing With
Look for droppings first. House mouse droppings are small, roughly the size of a grain of rice, with pointed ends. Deer mouse droppings are similar but slightly larger. The distinction matters — deer mice are the primary carrier of hantavirus in North America, and hantavirus is serious. Mortality rate around 38 percent according to the CDC. Rural cabins across the western and midwestern US have real deer mouse populations. This isn’t a theoretical concern.
If you find droppings, do not vacuum them. Do not sweep them dry. Hantavirus transmits through aerosolized particles from dried droppings and urine — exactly what a broom kick creates. Wear an N95 mask, not a dust mask. Wet the area thoroughly with a 10 percent bleach solution — one part bleach, nine parts water — or an EPA-registered disinfectant. Let it soak for five minutes, then wipe up with paper towels and bag everything in a sealed plastic bag before disposing of it.
Nesting Material
Mice nest in insulation, stuffed furniture, stored clothing, sleeping bags left in stuff sacks — any soft material they can find and pull apart. Check under seat cushions, inside stored sleeping bags, in the gap between your water heater and the wall. A nest that’s housed mice all winter will contain urine, feces, and potentially young. Same wet-cleanup process applies. No shortcuts here.
When to Call Pest Control
If you open in spring and find heavy droppings throughout the cabin, multiple nesting sites, or damage to wiring or insulation — call a pest control company before sleeping there. Chewed wiring is a fire hazard. Extensive contamination inside walls or insulation goes beyond what DIY cleanup can reasonably address. A professional assessment runs $150 to $300 for an inspection. Worth it when the situation is that far along.
Most spring openings — if you did the fall closing right — aren’t dramatic at all. A couple of traps, clean surfaces, and you’re grilling by noon. That’s the goal. The fall closing determines what April looks like, every single time.




Stay in the loop
Get the latest rustic cabin world updates delivered to your inbox.