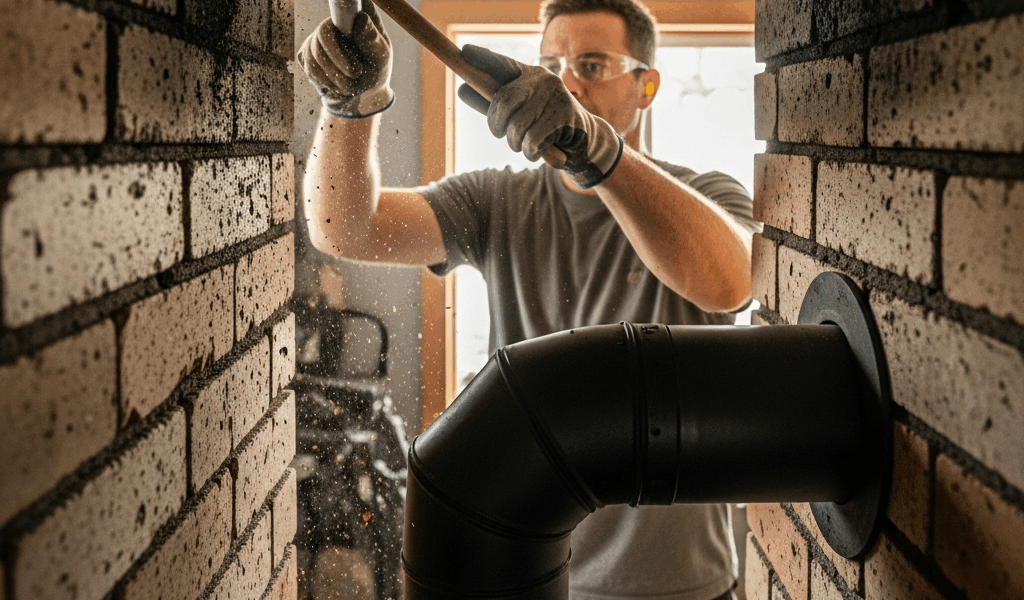
Wood Stove Chimney Creosote — How to Clean It Before It Becomes Dangerous
Wood stove chimney creosote has grown more complex with the conflicting advice flying around. As someone who heats a cabin in northern Minnesota primarily with wood, I put in the hours studying creosote the hard way — by ignoring it for an embarrassingly long winter. I burned through that first season thinking the crackling and popping I heard up the flue was just normal wood stove noise. It wasn’t. That sound was creosote igniting inside the chimney liner. Terrifying thing to piece together in hindsight. If you’re running wood heat as your main source — not burning three logs on Christmas morning — this is written for you.
The Three Stages of Creosote — Know What You Are Dealing With
Not all creosote is the same. But what is creosote, exactly? In essence, it’s condensed wood combustion byproduct — tar, soot, and chemical compounds that cool and harden against your flue liner walls. But it’s much more than that. The difference between Stage 1 and Stage 3 is essentially the difference between a Saturday afternoon with a brush and a phone call to a professional you didn’t budget for. Know what you’re looking at before you grab anything.
This article includes affiliate links. We may earn a commission at no extra cost to you.
Stage 1 — Flaky and Manageable
Stage 1 looks like dusty, flaky black soot. Dry. Almost powdery. Shine a flashlight up into your stovepipe and you’ll see something resembling charred cornflakes clinging loosely to the walls — that’s Stage 1. This is the version you want to catch it at. A standard wire chimney brush handles it without drama. Annual cleaning at this stage keeps everything predictable. That’s what makes Stage 1 creosote endearing to us cabin owners — it’s still our problem to solve ourselves, on our own schedule.
Stage 2 — Tar-Like and More Stubborn
Stage 2 is where things get harder. Shiny, tar-like consistency — like dried road tar or hardened black foam insulation. It clings. It doesn’t brush off with a standard brush. You’ll need a heavy-duty rotary system or a drill-powered brush setup to make a real dent in it. Some Stage 2 deposits respond well to chemical treatments like Anti-Creo-Soot spray — you apply it over a few fires to help break things down before mechanical cleaning. Not impossible to DIY. Substantially more work, though.
Stage 3 — Glazed and Genuinely Dangerous
Stage 3 is glazed creosote. Baked-on black tar — shiny, hard, sometimes puffed or dripping in shape. Extremely fuel-rich. Highly flammable. Impossible to remove with anything you’ll find at a hardware store. A chimney fire burning through Stage 3 deposits can exceed 2,000 degrees Fahrenheit — enough to crack clay tile liners, warp stainless steel, or blow through deteriorated masonry joints. Stop burning. Call a certified chimney sweep. Not a judgment. Just reality.
DIY Chimney Cleaning for Stage 1 Creosote
Worth mentioning before anything else. The tools list is what most people want first. Here’s what you actually need:
- A chimney brush sized precisely to your flue — measure the interior dimensions of your liner, not the outside of the pipe. A 6-inch round brush for a 6-inch round liner, an 8×8 square brush for an 8×8 clay tile flue. I use a Rutland 6-inch wire brush paired with SootEater fiberglass extension rods, 5-foot sections.
- Extension rods — enough to cover the full length of your flue. An 18-foot chimney needs four or five 5-foot sections minimum.
- Heavy drop cloths or plastic sheeting for the firebox opening and surrounding floor. Tape matters here.
- A shop vac rated for fine dust — the DeWalt DXV10P with a HEPA filter handles creosote dust without clogging constantly. Standard shop vacs without HEPA filtration just push the dust back into the room.
- Safety glasses and an N95 dust mask, at minimum. Side-step the error I made of skipping the glasses your first time through.
Cleaning from the Top — Preferred Method
Working roof-down is the cleaner approach. You drop the brush from the chimney cap opening and work it through the flue in sections, threading on extension rods as you go. Debris falls into the firebox below, which you’ve sealed off with your drop cloth taped around the stove opening. Once you’ve brushed the full length — let the dust settle for 15 to 20 minutes before you pull back the cloth and shop vac the firebox clean.
First, you should get a solid roof anchor sorted — at least if you’re working on a cabin roof with any pitch to it. A roof bracket with a ridge hook runs about $40. Frosted or damp metal roofing is not the time for this project. Learned that personally. Only avoided a bad fall because my boot caught the cap flashing on the way down.
Cleaning from the Bottom — When You Cannot Get on the Roof
Bottom-up works — but creates significantly more mess. You push the brush up through the firebox and stove collar, working upward through the flue. Seal the room aggressively. Creosote dust gets into everything — furniture, curtains, that guitar in the corner. Close interior doors. Run the shop vac continuously near the firebox opening to create negative pressure if you can manage it. Acceptable method for tall two-story chimneys in winter conditions where roof access is genuinely unsafe.
How to Prevent Creosote from Building Up
Incomplete combustion is the enemy. When wood doesn’t burn hot enough to fully combust the volatile gases rising through the flue, those gases cool against the chimney walls and condense into creosote. Everything else follows from that one fact.
Burn Seasoned Hardwood
Seasoned hardwood — split and air-dried for at least 12 months, ideally 18 — burns hotter and cleaner than green wood. Oak, maple, ash, hickory. The gold standard. Green wood is essentially a wet sponge — most of the energy goes toward evaporating moisture rather than generating heat, and your flue temperatures stay dangerously low. Low flue temperatures equal creosote. Simple.
Pine is complicated. I burn pine because it’s what grows here in northern Minnesota — softwoods get a worse reputation than they deserve. Dry, well-seasoned pine burned hot is manageable. The problem is pine burned slowly, smoldering overnight, in a cold flue. That combination creosotes a liner fast.
Hot Fires Beat Slow Smoldering Burns
This is what most cabin owners get backwards. A hot fire with the damper open wide produces flue gas temperatures high enough to prevent condensation. A slow, choked-down smoldering fire burns cool — and every hour of that is depositing creosote on your liner walls. For overnight burns, load up with dense hardwood and let it burn at a moderate rate rather than strangling the air supply down to nothing. Wood consumption goes up slightly. Creosote buildup drops dramatically. Worth it every time.
Keep the Damper Position Honest
Fully closed or barely cracked dampers are the problem. Once a fire is established and your flue is up to temperature, the damper can come down somewhat — but never past the point where you’re seeing sluggish, lazy flame behavior. Rolling yellow flame instead of active orange means you’ve gone too far. Open it back up.
Cabin-Specific Risks — Remote Location Fire Safety
The EPA puts creosote-related chimney fires at roughly 7% of all residential fires in the United States. That number feels abstract until you think about what a 34-minute fire department response time actually means for a burning structure. My neighbor’s cabin — two winters ago, chimney fire that spread to the roof — was a total loss before the first truck arrived. Total loss. That’s what remote location fire safety actually looks like.
The margin for error at a cabin is smaller than in a suburb. Prevention isn’t just advisable — it’s the actual infrastructure keeping you safe out there.
Detectors — Non-Negotiable
Every room where people sleep or spend real time needs both a smoke detector and a carbon monoxide detector. Not one combination unit in the hallway. Every room. CO is invisible and odorless — wood stoves with poor draft can backdraft CO into living spaces without any visible smoke or obvious warning. The Kidde KN-COSM-IBA combination unit runs about $35. That’s a reasonable investment against the alternative.
Fire Extinguisher Placement
One extinguisher near the stove — rated minimum 2A:10B:C. One near the sleeping area exit. Know how to use it: pull, aim, squeeze, sweep. A chimney fire still contained to the flue can sometimes be knocked down with a Chimfex chimney fire suppressor stick — about $25 per stick at Tractor Supply — which you drop into the firebox to deprive the fire of oxygen. It buys time. That’s not nothing.
When to Call a Professional vs DIY
Stage 1 creosote is a DIY job. Everything else involves an honest conversation about risk tolerance and equipment limitations.
Stage 2 can be DIY with the right rotary cleaning system — the SootEater drill-powered brush kit costs around $60 and does reasonable work on moderate Stage 2 deposits. But it often makes more sense to bring in a professional for thorough mechanical cleaning rather than spending a full day fighting buildup with consumer gear. Stage 3 is simply not a consumer-grade task. Period.
Frustrated by a surprise Stage 3 discovery one fall — I genuinely didn’t know how bad it had gotten — I called in a CSIA-certified chimney sweep and paid $285 for a full cleaning and inspection. Worth every dollar. For a cabin chimney with a prefabricated metal liner, professional cleaning typically runs $150 to $350 depending on your region and the condition of the flue. Masonry chimneys run higher, especially if inspection turns up cracked tiles or deteriorated mortar joints.
On frequency — clean annually at minimum. If wood is your primary heat source and you’re burning through 3 cords or more per season, a mid-season cleaning makes sense too, roughly at your halfway point. That threshold comes directly from the CSIA, and four winters of primary wood heat have confirmed it’s accurate. The chimney is the one part of a wood heating system that will genuinely hurt you if you let it go. Everything else forgives neglect eventually. The flue doesn’t.


Stay in the loop
Get the latest rustic cabin world updates delivered to your inbox.