Why Your Cabin Wood Stove Loses Its Heat
Cabin wood stove troubleshooting has grown more complex with the conflicting advice flying around. Forums say one thing, YouTube says another, and meanwhile you’re standing in a 38-degree cabin wondering why there’s a perfectly visible fire doing absolutely nothing useful. As someone who’s owned three different cabins and burned through more bad firewood than I’d like to admit, I taught myself the working side of why stoves fail to heat. Today, I will share it all with you.
Here’s the short version: four things cause roughly 95 percent of poor stove performance. Wet wood. A closed damper. Leaking pipe joints. Bad chimney pitch. That’s it. The stove itself is almost never broken. But most cabin owners skip straight to expensive fixes — new stoves, professional sweeps, full chimney rebuilds — without checking the obvious stuff first. Avoid the path I took.
What follows is a diagnostic sequence. Wood first. Damper second. Pipe third. Stove last. Work through it in order and you’ll have your answer before the sun goes down.
Check Your Wood First — It Is Usually the Culprit
Quick note before the rest of this. Wet firewood is the single most common reason a cabin stove refuses to heat — not a broken damper, not a bad gasket, not some mysterious draft problem. Wood. I burned an entire November weekend in my first cabin chasing phantom airflow issues before I finally stuck a moisture meter into a log and saw 47 percent staring back at me. Switched to kiln-dried wood the next morning. Stove worked perfectly.
Green or freshly cut wood holds 40 to 60 percent moisture by weight. Burning it is basically heating with a wet sponge. All that energy goes toward boiling off water instead of warming the room. Output drops by half — sometimes more. The fire smolders, gray smoke rolls out, and no damper adjustment on earth will fix it.
Seasoned firewood needs to hit below 20 percent moisture. Here’s how to check yours:
- The knock test. Grab two pieces and clack them together. Dry wood cracks sharp and loud. Wet wood thuds dull — like hitting a sandbag.
- Visual signs. Steam hissing from the ends, dark gray smoke, visible moisture bubbling out of cut faces. All bad signs. A clean, light-colored flame with thin smoke means you’re in good shape.
- The color check. Fresh-split wood is pale and almost white inside. Properly seasoned wood goes darker — sometimes silver-gray on the outside. Bark peels away without much effort.
Get a moisture meter. I’m apparently a Wagner Meters person — their MMC220 runs about $25 on Amazon and has saved me hundreds in wasted troubleshooting time. Push the two prongs into a freshly split face from the middle of your pile. Above 20 percent? Wood is your problem. Stack it under cover for next winter and buy kiln-dried from a local supplier in the meantime. Worth every penny.
Dry wood lights faster, burns hotter, and builds up far less creosote in your pipe. It’s the single biggest lever you have on stove performance. Everything else is secondary.
Check the Damper and Airflow Openings
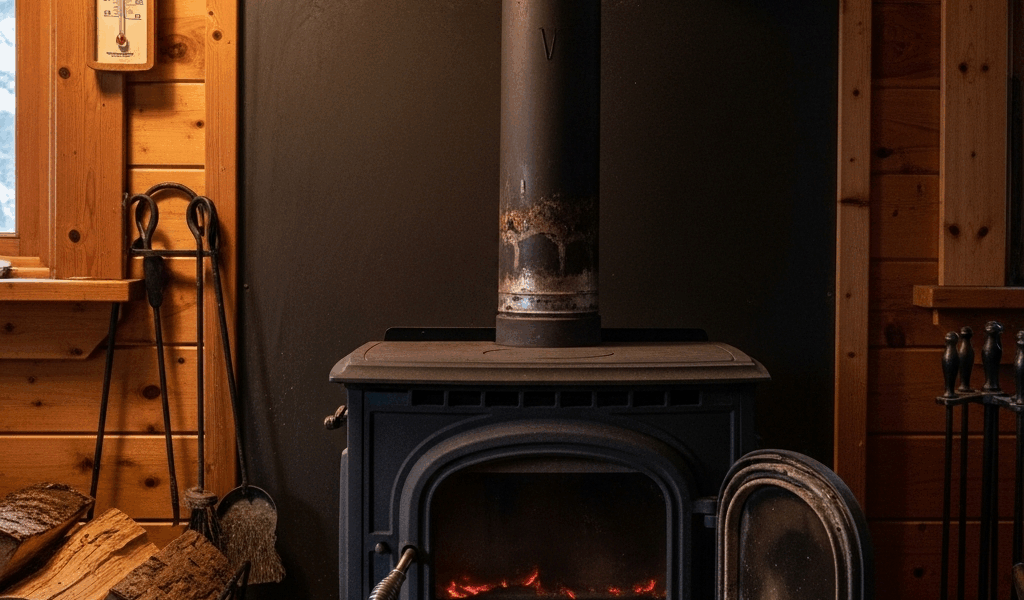
But what is a damper? In essence, it’s a metal plate inside the stovepipe that controls how much air moves through the fire. But it’s much more than that — it’s also the thing cabin owners accidentally leave half-closed from the last burn and then wonder why the next fire won’t draw. I’ve done it myself. More than once.
Find the damper handle — usually a lever or rod attached to the stovepipe, 6 to 12 inches above the stove collar. Open it all the way. Fully open. Not most of the way. Check any secondary air vents on the firebox sides too — those feed the combustion zone and should be wide open when you’re starting a cold fire. Watch what the flame does in the next 60 seconds. You’ll see a difference almost immediately if airflow was the issue.
Cold cabins create a specific startup problem worth knowing about. When the stove and chimney are at, say, 20 degrees, the dense cold air sitting in the flue fights against any draft you’re trying to establish. The fire lights but smoke pours forward instead of pulling up. Simple fix: roll a single sheet of newspaper into a tube, light one end, and hold it up near the open damper for 30 to 60 seconds before you touch anything else. That warming column of air reverses the density problem and primes the draft. Then light your kindling normally. Works every time.
Stuck damper? Run a stiff wire or narrow brush along the plate edges. Rust and old creosote love to seize them shut. Tap the handle with a rubber mallet — not a steel hammer — if it won’t budge. Once it moves freely, leave it open whenever the stove is running.
Inspect the Stovepipe for Gaps, Creosote, and Wrong Pitch
A single gap at a stovepipe joint — even a narrow one, pencil-width — can bleed off enough draft pressure to cut heat output by 30 percent. That’s a real number. Leaking joints are especially common in cabins where the stovepipe makes a horizontal run before going vertical, because the sections shift over time and nobody’s back there checking them.
Kill the lights and run your hand slowly along every joint where two pipe sections meet. You’ll feel cold air pulling inward at any gap — it’s unmistakable. A flashlight aimed up from below the joints will show you visual separation too. Any gap needs two self-tapping sheet metal screws, one on each side of the seam. Don’t use nails. Don’t overtighten — the metal will crack. Just snug them until the sections draw flush.
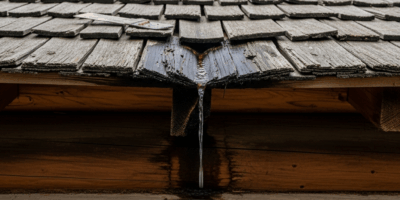
Horizontal pipe runs need upward pitch — at least 1/4 inch of rise per foot of horizontal distance toward the chimney. Flat runs trap smoke and let creosote settle out of the exhaust stream, gradually building up a blockage that restricts everything downstream. If your horizontal section is flat or — worse — slightly downhill, that’s your draft problem. Rehang it with proper pitch and recheck.
Creosote itself deserves its own mention. A thin, dusty layer inside the pipe is normal. A thick, shiny, tar-like crust is a fire hazard and a draft killer — it insulates the pipe walls and restricts the flue opening. Light buildup cleans up fine with a stovepipe brush kit, available at any hardware store for $30 to $60. Heavy, flaking creosote or any sign of a previous chimney fire — black scorch marks outside the pipe, warped sections — means you call a certified sweep. That is because chimney fires burn at over 2,000°F and can structurally damage the flue in ways you won’t see from the outside.
When the Stove Itself Is the Problem
You’ve checked the wood. Opened the damper. Sealed the pipe. Still cold? Now we look at the stove.
Start with the door gasket — the rope or strip seal running around the inside of the door frame. A degraded gasket lets cold room air leak into the firebox, disrupting combustion and dropping firebox temps. Test it with a dollar bill: close the door on it, then pull. Any resistance at all means the gasket is sealing. Pulls out smooth with zero drag? Gasket is dead. Replacement rope gasket kits run $40 to $100 depending on stove brand and diameter — order by model number, not by eyeballing it. Installation takes about 20 minutes with high-temp stove cement and basic tools.
Inside the firebox, check the firebrick lining and the baffle plate. Firebrick — those dense, tan-colored blocks lining the walls and floor — reflects radiant heat back into the combustion zone and keeps temperatures high enough for complete burn. A cracked or missing brick drops efficiency noticeably. Baffle plates redirect hot exhaust gases across the top of the firebox before they exit, extracting more heat before it goes up the flue. Worn or warped baffles mean that heat just disappears straight up the chimney. Replacement bricks run $8 to $20 each. Baffles vary wildly — $80 to $250 — depending on stove age and manufacturer.
If your stove is pushing 25 years old and needs a new gasket, firebrick, and baffle, you’re looking at $400 to $600 in parts before labor. A solid used stove — a Vogelzang or similar — runs $300 to $800 at most farm supply stores or on Craigslist. Do the actual math for your specific stove before you commit to a full rebuild.
That’s what makes this diagnostic sequence endearing to us cabin owners — it saves money by ruling out the cheap fixes first. Check the wood. Open the damper. Seal the pipe. Most of the time, that’s enough. The cold nights ahead are brutal enough without fighting a stove that just needed a little attention.

Stay in the loop
Get the latest rustic cabin world updates delivered to your inbox.